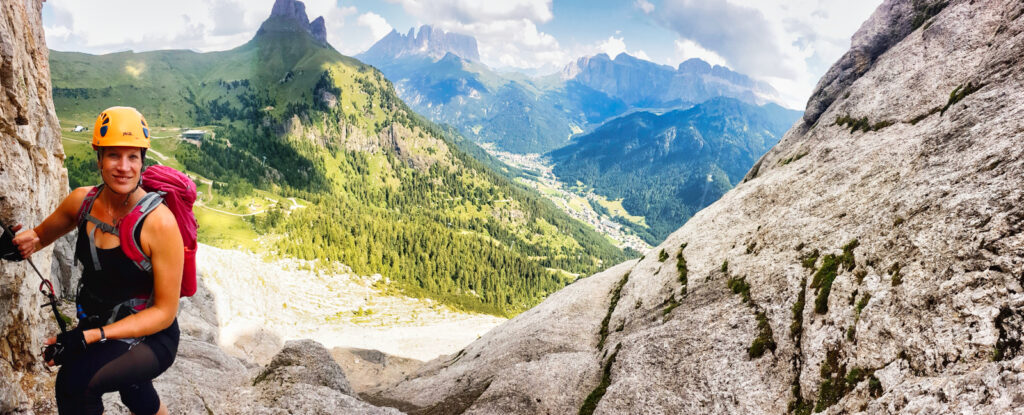
Via ferrata is what the Dolomites are famous for. Originally created through necessity during the fierce fighting of WW1, these cabled scrambles allow those of modest ability to access the most spectacular rocky faces and viewpoints. There are a huge number of these fixed protection climbing paths in the Dolomites which are graded by difficulty. If you like scrambling and have a head for heights, there is something for all abilities which will give you a truly memorable experience. Once you have the via ferrata bug, we guarantee you won’t look back!
Val Pettorina boasts three of the finest routes in the Dolomites and in the surrounding area there are other great routes worth visiting.
What to expect from a Via Ferrata?
As already mentioned, Via Ferrata is massively variable in difficulty from what amounts to a protected path, through to highly atheletic outings with suspension bridges, overhangning rung ladders, routes which require proper climbing ability and which could be anywhere between a somewhat trivial trip lasting a couple of hours through to multi-day circuits in a high mountain, serious environment. Often there will be sections which are moderately to very exposed, so a head for heights is essential. So at a minimum you should have some walking and preferably scrambling experience. For the longer routes you need good fitness with approaches and descents often lasting a couple of hours.
What Equipment do I need?
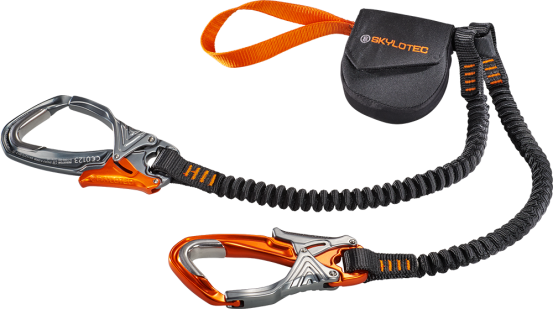
Via Ferrata is a dangerous activity and you need to equip yourself appropriately. You will need at the minimum a climbing sit harness, a purpose made shock absorbtion lanyard and a helmet – these are made by a variety of different manufacturers with varying features. In addition a pair of walking shoes or boots are a very good idea and if you intend to do multiple trips, investing in specific boots designed for the job is a good idea. Furthermore you’ll need a waterproof coat incase of rain, water, food and most likely a map of the local area and the knowledge how to use it.
If you don’t want to buy your own harness, lanyard and helmet, you could rent them from a sport shop, like De Grandi Sport in Boscoverde for a daily fee.
I hear I could make my own lanyard kit.
This is absolutely 100% not the case. It is not worth risking your life trying to bodge a kit together – the karabiners must be K rated CE certified carabiners, the absorber is specifically designed to withstand high impact forces. Although you can buy a self assembled kit from Kong SPA consisting of a KISA plate, there are complete kits for a very reasonable price available from Decathlon. And if you’re only doing one route, rent a kit. A lanyard made of a length of rope is absolutely not sufficient and will result in severe injury at best should you fall.
When to come?
In theory, you can complete a via ferrata at any time in the year. But the main period is between June and Mid October. Early in the season, it is highly likely that on higher routes you will encounter snow, especially on routes which cross gullies or are north facing. It is advisable tocarry crampons and/or an ice axe during these periods. At the end of the season, snow showers can occur so be prepared – infact they can occur at any time of year. The best times, in my opinion, are June to mid July and September – Late July and August can be very hot and as a consequence afternoon thunderstorms are very common.
How safe is Via Ferrata
Ask different people and you will get different answers. In my opinion as a climbing equipment designer, I would say that you need to be aware of the limitations of your equipment. A VF Lanyard should be regarded as a death prevention system, not something which can be fallen on with intent. As a result you need to make sure that you can climb the proposed route with a good margin of ability and not rely on the lanyard to save you. VF falls are without a doubt about as nasty as they get – there are rungs sticking out, bars holding the cables to hit, often ledges to land on, and you will travel some distance before the lanyard even starts to catch you. Infact if you fall from the top of a cable section which has been bolted at the UIAA suggested distance of 2m, by the time your system starts to catch you you’ve fallen close to 3m, and the lanyard will extend a minimum of 1m, if not 2. If it’s a really heavy fall, with some systems you will be coming to rest only after 7m or more!
The point is, try not to fall. All this said, it is extremely unlikely that you face such a result for real. Just be aware of the consequences.
Another aspect of your safety is related to weather hazards, in particular thunderstorms. For obvious reasons, being in an exposed position high on a mountain is never recommended, especially so when you are connected to a lightning conductor. If the weather starts to close in, try to reverse back down, or find a deep cave to wait it out in. If you are caught with few options, try to get as far away from the cable as possible whilst maintaining your safety. Again, preparation here is key – if you are uncertain of the weather forecast, don’t go, or aim to start early and finish early. Aim to be off the route by 1-2pm as most storms roll in around 3-4pm.
Gear
As previously mentioned you need:
A certified Via Ferrata Lanyard – there are many options – Skylotec Skyriser, Petzl Scorpio, Black Diamond Iron Cruiser for example
A sling to rest on – personally I don’t carry a sling for this purpose but many do. If you are into taking photos it could also be useful, and the Petzl Connect adjustable lanyard is particularly useful to take up any slack in the system.
A certified climbing sit harness – this could be a harness you already use for rock climbing or general mountaineering. In years gone by chest harnesses on its own were included in the list of suggested solutions but this has been shown to be unsafe and only a sit harness or full body harness is now considered adequate.
A certified climbing helmet – the point here is it should be a specific climbing helmet – a cycling helmet will afford some protection but they are simply not sufficient with regard to point impact on the crown of your head which climbing helmets are designed to withstand.
A rucksack – almost any rucksack will do the job. Personally I take a pack of around 25-30l as this gives sufficient space to carry everything I need inside the back, but not so large that it gets stuck in narrow tunnels or crevasses. Climbing models are particularly suitable as they are simple and clean with a minimum of straps to get caught on rocks.
A waterproof – any waterproof will do, but one with a hood designed to fit over a helmet is a good idea and which is designed to allow a good degree of movement. There are many climbing-specific models which will be ideal for this. Even on a sunny morning, do not be tempted to leave without one – if you are unable to move from a location during a storm, you need to ensure that you are reasonably warm and dry when it ends. It should be regarded as essential safety equipment.
A warm layer and a warm hat – again, this is to cover the eventuality of being unable to move during a storm. It is not uncommon for thunderstorms to include snow or hail fall. Once you have stopped moving your core temperature will drop extremely rapidly and you need to make sure you avoid hypothermia. Fleece or synthetic down jackets are ideal; synthetics stay warm when wet and are far preferable to duck or goose down, despite having a larger pack size and weight.
Appropriate footwear – this is a more tricky subject and is very personal. I use approach shoes which have a semi-stiff sole and a “climbing zone” at the toe of the shoe for increased precision when scrambling or climbing on harder sections of the route. If the approach is particularly long, I might instead take a mid-height boot with a climbing zone and sticky rubber soles. Many others will take a B1 or B2 technical mountain boot with a climbing zone. It all depends on how comfortable you are on the type of terrain you’ll be crossing. That said, it’s easier to define what not to use – any sort of trainer with a smooth sole unit is totally incorrect as frequently you will encounter loose gravel or dust which is easy to slide on if the sole unit does not have a sufficiently deep tread on at least the heel of the shoe.
Water and food – The Dolomites are quite arid despite the high rainfall, this being due to the porous nature of the rock allowing water to easily drain away. Do not rely on springs or streams. In high mountain huts you will be charged for bottled water as they simply cannot collect enough to give it away, so if you do not want to pay for it, take sufficient for the day. The same goes for food.
Gloves – personally I do not use or recommend gloves for pulling on cables. Instead, I find it better to climb the rock or use rungs and cable bolts to pull on. If I have to take the cable, I will grip it firmly enough not to allow it to slip in my hand and I do not run my hand up the cable as there may be broken threads which can catch your skin. It’s a personal choice.
A map – this should be considered essential equipment along with the ability to use it, although all maps for the Dolomites are made on quite flimsy paper. I prefer the Tabacco range to Kompass as I find the mapping clearer. Another alternative, or better a backup to a physical map is to use a mapping app. My preferred option is the Mytrails app, which allows you to freely download sections of the Kompass maps. It provides GPS, tracking, height and various other helpful tools.
Ice Axe and Crampons – this only really counts for certain routes and if you are climbing early or late in the season when you should be prepared for buried sections of cable in gullies or on north-facing ledges. During the main season, it is unlikely that they will be of use on anything other than the highest routes, for example, Marmolada. A single walking axe and a pair on 10 point crampons is sufficient. Microspikes could be used if you understand their limitations.
Walking Poles – collapsible trekking poles have been around for decades and they are great for taking some of the load off your legs and can provide all the security you need to cross snow patches on the approach or descent. The best sort to buy are foldable poles which are usually short enough to be stowed inside your rucksack – the reason this is preferable is that it prevents them from catching rocks above your head (particularly useful in ww1 tunnels!)
Headtorch – on some routes, for example, the Lagazuoi tunnels, a head torch with fully charged batteries is essential to allow you to navigate WW1 tunnels. There are many models, one with a focusable beam and LED bulbs are preferable.
Rope and belay device – these items are optional and whether you take them will be based on the route you are climbing, the strength of your group and weather conditions. Firstly and most importantly, if you are Climbing with small children who weigh less than 50KG, a rope is essential, and they should be belayed or short roped at all times. VF Lanyards for these individuals are inappropriate and will cause significant harm to the user in a fall. If you take a rope, a 20m length of 9mm dynamic climbing rope is the right sort of thing to take. Also a belay device, for example, an HMS carabiner which can be used with an Italian Friction hitch as a direct belay to be attached to a staple or cable bolt. Make sure the gate opening dimension on the carabiner is sufficiently large. A double-length sling can also be useful. Edelrid makes a specific belaying kit complete with a bag and belay device.
A first aid kit – it is sensible to carry a small first aid kit with you.
A mobile phone – although not essential, it’s sensible to carry a phone should you encounter serious difficulties or become injured. Make sure you know how to contact the emergency services.
Insurance – now that the UK is no longer part of the EU, it is sensible to purchase appropriate insurance which covers injury, repatriation and rescue in Europe. The situation currently is not entirely clear so my advice at the moment is to make sure you are covered.
Grading
There are a number of grading systems. On this website we use the Fletcher/Smith system as we feel it gives the best overall information about a route, as opposed to a single letter or numeral used by most other systems. The grade consists of a number and a letter, the number indicating specific technical difficulty with the letter giving an idea of seriousness. 1 indicates technically easy (often a protected walking or scrambling path, 5, technically difficult with sections of unavoidable tricky rock climbing. A is a route which is short and easy to access, whilst C tells you the route will be sustained, in a serious and remote environment. So for example you could have a 5A which would be a modern “sports” ferrata with steep climbing but in a benign and easily accessed location, or a 1C which would indicate a protected path several hours away from the valley floor and perhaps with unprotected sections where a fall would be serious.
Printed Guidebooks
There are a great number of printed guidebooks. These pages are not intended to replace those but to augment the information provided by them. For English speakers, Cicerone Press and Rockfax guides are fairly unbeatable for the amount of information presented – the former are much more complete in the number of routes they include, especially in the southern Dolomites.